
Direct Debit User Guide: Senior Direct Debit
Email Status Reporting Process
Annual Amendments - File Exports
Payment Holidays and Bulk Amendments Combined
The Direct Debit Collection Process
Introduction
The purpose of this Senior DD user guide is to illustrate the Senior DD permissions of the allpay Direct Debit portal and give you an understanding of the processes involved with the Bacs Direct Debit setup and collections.
Support and Training
Support
Telephone and email support are available from allpay during office opening hours: 8.00 am to 6:00 pm Monday to Friday. The team are also available on a Saturday morning 8am to 12 noon.
Training
To maximise the benefits of the allpay Direct Debit portal for your organisation and minimise time and administration in the future, we recommend that all users receive training before using the system. Training materials including videos can be found in the ‘Help and Support’ section of the allpay Direct Debit portal.
What are Direct Debits?
Direct Debits are a simple, flexible and automated method of payment collection. A new Direct Debit maybe initiated in one of two ways:
- The primary method involves completion of a Paperless mandate via telephone, online or in person with the organisation
- The secondary method is by customer completion of a paper mandate
Key Information about Direct Debits
- Only set up a Paperless Direct Debit when you are dealing directly with the bank account holder
- If at any point you are unable to proceed with a Paperless Direct Debit, a paper Direct Debit mandate may be completed to allow the process to continue
- If the bank account requires joint signatories, both payers MUST complete and sign a paper mandate before you can set up the Direct Debit on the portal, and the original MUST be sent to allpay
- Advance notification is required when processing all-new Direct Debit Instructions. This period must include two days to allow for the postal system to deliver the Direct Debit creation confirmation letter
- Advance notification is required to process all changes to existing Direct Debits (except closures). This period must include two days to allow for the delivery of the amendment confirmation letter or email
- A Direct Debit may be closed at any time. If the Direct Debit collection has entered the Bacs cycle (three working days before collection date), the collection cannot be cancelled but the customer can contact their bank to stop the payment
- If closing and reopening a Direct Debit on a Bureau scheme, the minimum period required between the two actions is 1 working day
- If the Direct Debit value exceeds a pre-set limit which has been set by the allpay DD portal administrator within your organisation, the Direct Debit request will need to be approved by a user with ‘Approver’ permission. Anyone with the ‘Manage DD Settings’ permission can amend the pre-set limit at any time.
Direct Debits Reference Guide
Direct Debit Guarantee
Direct Debit is the only payment scheme that protects the interests of the Payer with a guarantee. The Direct Debit Guarantee assures the Payer that any monies debited in error will be immediately refunded by the Payer’s bank.
allpay, as a Direct Debit Service User, is fully authorised by its sponsoring bank.

Direct Debit Instruction (DDI)
The Direct Debit Instruction (DDI) is the method by which Service Users obtain the Payer’s authority to debit their account. allpay’s Paperless service enables you to sign up your customers for Direct Debit collections by telephone, online or face to face, removing the need for them to sign a paper mandate.
This information should be made available to all personnel setting up, amending or closing Direct Debits through the allpay Direct Debit portal.
Rejected Direct Debit Instructions
If the Direct Debit Instruction is rejected by your customer’s bank on BACS reason code 5, F, G, L or N, you will be informed in your daily download file via File Manager, for you to contact the payer to arrange an alternative payment method. A cancellation letter will also be sent to your payer.

This information should be made available to all personnel setting up, amending or closing Direct Debits through the allpay Direct Debit portal.
Dormancy
Once the last payment in a fixed payment schedule has been collected, the Direct Debit will go into a dormant state until closed by the customer, client, allpay or the bank. However, the client can re-instate the Direct Debit so long as this is within the 24 month dormancy period, by simply modifying the Direct Debit and adding a payment schedule. If the Direct Debit has been dormant for more than 24 months, the Direct Debit must be closed and a new Direct Debit Instruction set up.
Set-up Rules & Requirements
As an allpay client, you must ensure that your staff follow the script provided by us on the allpay Direct Debit portal for set-ups over the phone and face to face. This script has been approved by our sponsoring bank. The use of this script shall ensure that the Payer has clear information and is left in no doubt that they have agreed to pay by Direct Debit and have set up a Direct Debit Instruction (DDI).
Please see the ‘Manage DD user guide’ for further information on this function.
Collection & Validation of Payer’s Details:
- It is important for you, the client, to verify the identity of the Payer and their address, before the creation of any Direct Debits
- It is also essential that you, the client, obtain from the Payer, details of their bank account including the sort code, account number and account name8allpay Direct Debit - Advanced Features Guide v1.2
- You MUST confirm that the Payer is the only person to authorise debits from this bank account. This information will assist allpay in its compliance with the rules of our sponsoring bank before we can submit the Direct Debit Instruction (DDI) to the paying bank
If the customer is not the account holder and therefore not the payer, or more than one person is required to authorise debits from the account, a paper mandate must be sent to the payer(s) for completion. The Direct Debit must not be set up until this paper mandate is completed and duly authorised by the payer(s).
- As you enter the Payer’s bank account details into the allpay Direct Debit portal, either on the telephone or face-to-face, our portal will automatically perform a ‘modulus check’ on these details. This will enable you to correct any invalid information
- Please see the ‘Manage DD guide’ for further information on this function• During the sign-up process, you need to confirm to the Payer:
- The first collection date
- The frequency of the Direct Debit
- The amount that will be taken
If at any stage the payer does not wish to proceed with the Direct Debit sign-up process, a paper mandate can be sent, unless a payer withdraws from requesting a Direct Debit payment completely. As always, the Direct Debit Instruction must not be set up until a completed paper mandate, duly authorised by the payer, has been received by you, our client.
Confirmation of Payer Sign-up
allpay will issue the Payer with a written Direct Debit confirmation letter within three working days of signup. The letter will include the Payer’s sort code, account number (the first four digits will be obfuscated), account name, Direct Debit Guarantee and reference number.
This confirmation letter incorporates the Advance Notice and will be received by the Payer within the required advance notice period.
As the confirmation letter and the Advance Notice are incorporated as one, it also includes the amount to be debited, first collection date, frequency and advance notice period.
Payer’s Records: For the protection of Payers, allpay will maintain archive records of all communications with the Payer, i.e. Direct Debit Confirmation Letter and Advance Notice.
Proof of dispatch of a confirmation letter incorporating advance notice is not proof of receipt by the payer.
We will maintain information for all your Payers’ current records. This will cover information in respect of:
- Creation of new Direct Debit Instructions
- Amendments and cancellations
- Records of amounts and dates of payments collected including identification of initial and final Direct Debits
Direct Debits Settings
Settings for Direct Debits are configurable by the client code. This is particularly useful where an organisation may have several client codes:
- From the Direct Debits tab choose ‘Manage DD settings’. If you cannot see this feature you do not have the correct permission. Contact someone within your organisation that has Manager User permission to upgrade your user account

- From the Client code drop-down menu choose your required client/scheme code from the list
Changes are applied on an individual client code basis, so it is possible to have different settings applied to different client codes.
- Choose the options to be amended:

Client code details
These details are set at the client code level and cannot be altered via the Settings option. Please contact allpay for further information:
- SUN
This is the service user number for your scheme that is registered with Bacs and it cannot be amended
- Scheme
This is the type of DD scheme you are on, either Non-Bureau (FM – allpay are the service user) or Bureau (you are the service user)
- DD Type
Client codes can either be Variable (each collection requires advance notice) or Standard (advance notice is given at setting up and when the date, amount, or frequency of the DD changes). They cannot be both
- Advance notice period
The standard notice period is 10 + 2 working days (10 working days notice and 2 working days to send out communication) but can be as little as 3+2. Please contact your allpay Client Development Manager if you would like to change the advance notice period for your scheme(s)
Approvals
- Payment Approval amount
This is the maximum amount for any scheduled collection. When a Direct Debit is created or amended and exceeds this maximum limit, it will need to be approved before being submitted to allpay. In this example, it is set at £5000.00, which is the default amount. Enter a new value to change the approval amount
- Approval for new DDIs required
As a default, all new DDIs will need to be approved. Uncheck the box to remove the approval requirement
If the user creating the DD has approval rights this will be overridden.
- Approval for Amend/Close
As a default, any amendment or closure request will need to be approved. Uncheck the box to remove the approval requirement
If the user amending the DD has approval rights this will be overridden.
- Approval notification required
Should an approval notification e-mail be required to notify users that requests need approval, this box should be checked, and a choice selected for either Daily or Hourly email notification
Additional Services
These details can be altered via the Settings option.
- Re-presentment
Each client code will need to be enabled for re-presentment. See Direct Debit Representment for more information
- API
This enables the communication between your portal and the allpay DD portal. Please contact your allpay Client Development Manager for further information
Customer communications
Postal & Email details are set at the client code level and cannot be altered via the Settings option. Please contact your allpay Client Development Manager for further information.
The SMS option is available to edit, check the box to select.
- Postal, Email, SMS
Communications can be sent out to customers via letter or email. New DDIs will still receive written notification but amendments can be communicated by email. Contact allpay to change the Sender name if required
Disabling SMS will permanently delete all mobile numbers stored against Direct Debits for this client code.
Payment notifications
The system will send out payment reminders, failed payment notification, and re-presented payment details to customers via email and/or SMS.
Tick the boxes that apply to utilise these features if they are enabled at the client/scheme code level.
Payment frequencies
As a default, all collection frequencies are displayed. Uncheck a box to disable the frequency.
The payment frequencies will only be visible on standard client codes, not on a variable.
- Choose Submit to apply the changes
Direct Debits Representment
A re-presented Direct Debit is when a scheduled collection which has been returned unpaid by the paying bank is presented once more for collection.
Bacs rules state that unpaid Direct Debits must be re-presented within one month of the initial attempt at the collection:
- The re-presentment amount must be the same as the initial amount
- allpay will only re-present payments that were marked as returned with the Bacs code ‘0 Refer to payer’
- Re-presented payments are identified in the Bacs collection file as transaction code ‘18’
Re-presentment - Turning it on
- Log into the allpay portal and navigate to the Direct Debit Settings page and select a ’Client code’
- If the client code is not currently enabled for re-presentment then the ’Representment payments’ box will be unchecked
- Enable ’Representment payments’ by checking the box

- Once the ’Representment payments’ option has been enabled in your settings, allpay can configure the number of pre-presentment delay days. This is the time between notification of a failed payment and representment. The default setting will be 5 days
Re-presentment - Turning it off
You can turn off the re-presentment feature for your client code at any time:
- Log into the allpay portal and navigate to the Direct Debit Settings page and select a ’Client code’
- Uncheck the ’Representment payments’ feature
- A confirmation box will appear

Disabling the representment feature will cancel any r-presented collections that have not already been processed by Bacs. They will not be restored if representment is enabled again at a later date.
- Choose ’Submit’ to apply the changes
Managing Users
Any users with the ‘User Manager’ permission enabled can set up new users and amend or delete existing users using the ‘Manage users’ tab.
Creating a New User
- From the top menu, select ‘Manage users’
- Select ‘Create a new user’

- Enter the ‘First name’, ‘Last name’ and ‘Email’ for the user

- Once entered, select ‘Create User’. The user will automatically receive an email containing instructions to register their account for use on the system. Select ‘Cancel’ to return to the previous screen
User Permissions
Each user will need to be assigned permissions.
There are two distinct user groups available:
- Manage DD
Permissions available for this group are:
- File import/extract
- Amender
- Creator
- Viewer
- Senior DD
This group offers extra permissions of:
- Approver
- Edit DD settings
- Refunds
Also, a user who is a member of the Senior DD group will automatically have the User managers permission granted. This User manager’s permission can be removed through the User management tab.

Roles
This will determine which options the user has access to and which areas of the system they can access:
Approver: These users can approve Direct Debit requests
Edit DD settings: These users can amend and manage Direct Debit settings
Refunds: These users can action refunds on a Bureau code via the portal
File import/extract: These users can import and export Direct Debit files and submit creation and amendment instructions to be sent to allpay
Amender: These users can amend and close Direct Debits
Creator: These users can create new Direct Debits
Viewer: These users are restricted to searching and viewing Direct Debits
Select ‘Save user access’ to update the permissions.
User management tab
User managers: These users can create and amend user accounts on the system

Select ‘Save changes’ to update the permissions.
Managing Existing Users
From the top menu, select ‘Manage users’.
You can search for an existing user by entering, ‘First name’, ‘Last name’ or ‘Email’:
- Select ‘Search’
- To delete an account, select the black cross in the ‘Delete’ column
- To edit an account including permissions, select ‘Edit’
Only permissions can be edited here.
- Select ‘Save changes’ to update
Failed Payments
Failed payments that have been returned unpaid under Bacs code 0 – Refer to Payer only are available to view on the portal. All other Bacs codes for unpaid DDs will be available to view on your daily payment file downloads.
Searching for Failed Payments
- From the ’Search’ tab select ’Failed payments’
- Select a ’Client code’ from the drop-down box, enter the date range and any further search criteria, and select ’Search’
If a client code is enabled for re-presentment, the re-presentment date search criteria will also be displayed.

- Review the list of failed payments. The ’Representment date’ field indicates the date allpay will represent the payment for collection
- You can export the failed payments to an Excel spreadsheet by selecting ‘Export failed payments’

- Select ‘View details’ to view an individual account
Cancelling Individual Re-presentments
You can cancel a representment before it is sent to Bacs for processing. Representments will appear in the ‘Payment summary’ of each Direct Debit account:
- Select ‘Cancel’ in the ’Correction’ column and a confirmation box will appear

- Select ‘Yes’ to cancel the representment collection
Email Status Reporting Process
If email communication is enabled on your client code, you will be able to report on the status of customers’ email addresses. This includes emails pending verification and/or where no email address has been supplied.
Searching for Email Address Status
- From the ’Search’ tab select ’Email address status’
- Select the ’Client code’ and the ’Verification status’
- Select ’Search’ to view results
Export Email Address Status Report
From the search results page, you will be able to ‘View details’ of individual customers, or ‘Export email address status report’ to an Excel spreadsheet.
In this example, I have selected ‘All’ for the status which shows results for both ‘Pending verification’ and ‘No email address supplied’.

if you filter the results using the 'Pending verifications' option, you can now choose to 'Resend All' which will send out another verification email to the recipient.


Only verification emails that have not been sent within the last 24hrs will be resent, and the number sent will show in the button itself.
If there are no emails to resend or emails have been sent within 24hrs, the button will be greyed out and marked 'Resend Disabled'

Requests - How to Approve
The allpay portal can be configured so that all Direct Debit requests have to be approved by an authorised user with the Approver permission (See ‘Managing Users’ section) before they are processed and submitted to allpay. This will enable greater control over Direct Debit administration and introduce an additional check on all set up, amendment and closure requests.
Any queued closure requests (closures that will take effect on a future date) that have been processed are also held under their menu so you can view the entire list of Direct Debits that have a queued closure request against them.
Historic requests can also be viewed from this menu. This will contain all records that have been processed or cancelled on the system. A user with the Approver permission has access to a summary area that contains their batch summary of approvals and closures that have been processed. Their permission overrides the Approval process and all requests made by them will be self-approved processed immediately.
Other users’ batch summaries cannot be viewed; you can only view your batch summary.
Valid Requests
This approval queue will only contain requests that are valid and can be successfully processed.
Reviewing Valid Requests
- From the top menu, select ‘Requests’ and then select ‘Valid’

- From this screen, you will see the list of requests waiting to be approved or cancelled

- You can filter the type of requests by selecting the drop-down box at the top of the screen
- The origin of the request will appear in the ‘Reason’ field
- To view individual requests, select ‘View’ and the Customer Details, Bank Details and Payment Details will be displayed below
- Amendments, Online presentment, and API requests can be edited directly by selecting the ‘Edit’ option
You cannot edit new DDI requests for Paperless client codes. If any details are incorrect the request would need to be cancelled and a new DDI created with the permission of the payer.
Requests - How to Approve or Cancel
- You can select the ‘Approve all pending requests’ option to approve all requests that are waiting in the queue

- Alternatively, you can select ‘Cancel all pending requests’ if you wish to cancel all requests that are waiting in the queue

- You can also process a selection of the requests to approve or cancel, rather than approving or cancelling ALL requests pending. You can select the individual requests using the checkboxes on the right-hand side of the requests to be processed
To cancel or approve all requests over multiple pages the ‘Approve all’ or ‘Cancel all’ buttons foreach page must be used.
- You can select the ‘Approve selected requests’ option to approve all selected requests that are waiting in the queue

- Alternatively, you can select ‘Cancel selected requests’ if you wish to cancel all selected requests that are waiting in the queue

- A popup box will appear to confirm your wish to approve or cancel the requests. Select ‘Ok’ to confirm or ‘Cancel’ to return to the previous screen

- A progress bar will appear to confirm the progress of the approval
- Approvals Only - A summary screen will appear that will confirm the date and time the approval was ‘Created on’ and ‘Completed on’, the ‘Status’ of the request, the ‘Type’ of request and the ‘Total submitted’

- The links at the right-hand side of the summary screen will take you to the individual requests that were processed. The different types are as follows: Requests approved – A summary of the number of requests that have been successfully approved.
- Invalid requests – A summary of the number of requests that are invalid and haven’t been successfully processed. The reason why the request is invalid is given when you view it
- Queued closures – A summary of the number of queued closures processed i.e. closures that have been scheduled and successfully approved (if required) to process on a future date
- Superseded Closures – A summary of the number of closure requests that have overwritten existing closure requests in the system. These are called superseded requests. For example, there is an approved existing closure request in the system to close a Direct Debit in six months and a closure request has been processed that will close the Direct Debit in two months. The new request for closure for two months will overwrite the existing closure request of six months
- Selecting one of the hyperlinks will take you through to a further summary screen that will detail the individual requests processed

Approvals Process - Online Presentment
Where the Direct Debit was created online it will show ‘Online’ in the reason column. Only users with the Approver role can approve these records. A non-approver with edit rights may edit them but not approve them.
- Select ‘Edit’ to view the direct debit details
- You will be able to check and amend the details at each step of the setup process by using the ‘Back’ and ‘Next’ buttons
- Select ‘Approve the request’ on the confirmation screen when you are ready to submit
Invalid Requests
This approval queue will only contain requests that are invalid and have not been processed.
If a user originally set up a Direct Debit with the minimum advance notice period and the approver does not approve the request on the same day, the request will now become invalid. The required advance notice will not be adhered to because the request would not have been processed until the request is approved.
Invalid requests may be present in a file that has been imported. All invalid requests in a file will fall through to the ‘Invalid’ queue for awareness:
- From the top menu, select ‘Requests’ and then select ‘Invalid’

- From this screen, you will see the list of Invalid requests

- You can filter the type of requests by selecting the drop-down box at the top of the screen
- Select ‘View’ to display the request in full. The reason for failure will be detailed at the top of the request

- For some Invalid requests, you will be able to select ‘Edit’ to address the errors within the request. The user will need relevant permissions to perform this task
- To cancel all pending requests, select the ‘Cancel all pending requests’ option
If the requests cover multiple pages then the ‘Cancel all’ option should be used for each page.

- Alternatively, you can cancel specific records by using the checkboxes to select individual records
- Select ‘Cancel selected requests’

- A confirmation screen will appear. Select ‘Ok’ to process or ‘Cancel’ to return to the previous screen

Queued Closures
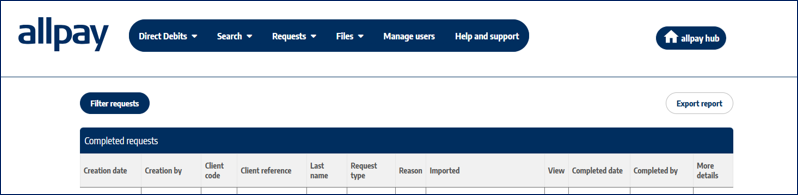
This will contain all of the queued closure requests, i.e. Direct Debit requests scheduled to close at a future date. All closure requests on the system will be displayed by default, but there are filter options to narrow down the list further.
- Select ‘Requests’, then ‘Queued closures’

- All queued closure requests are displayed here
- To filter the requests further, select ‘Filter requests’
- Select a ‘Client code’ from the drop-down box
- Next, you can enter the ‘Client reference’ and/or the ‘Last name’ to search for a specific account
- You can also search using a date range when the request was created, along with the username of the user who created the request
- You are also able to search for cancelled requests, along with the username of the user who cancelled the request
- Once you have selected your criteria, select ‘Search’ or you can select ‘Reset’ to remove all of the criteria you have selected

Historic Requests
This will contain all of the historic requests (both completed and cancelled) that have previously been processed.
- Select ‘Requests’, then ‘Historic’
- Next, select either ‘Completed’ or ‘Cancelled’ from the top tabs

- First, select the ‘Request type’ from the drop-down box or you can select ‘All’ to search for all request types
- Select ‘Client code’ using the drop-down box or you can select ‘All’ to search for all client codes
- Next, you can enter a combination of ‘Client reference’ and ‘Last name’ to search for a specific account
- You can search using a date range when the request was created, along with the username of the user who created the request
- You can also search using a date range where the request was originally ‘Completed/approved’, along with the user name of the user who completed or approved the request. For a ‘Cancelled’ request search, this would be the date the request was cancelled
- To export the data, select the 'Export' button
Once you have selected your criteria, select ‘Search’ or you can select ‘Reset’ to remove all of the criteria you have selected

My Batch Summary
This section will only apply to users with Approver permission.
This will contain a summary of all requests that have been approved, processed, or cancelled by you on the portal. You will only need to access your batch summary if you utilise the Approval option on your Direct Debit settings.
You will only be able to view your batch summary history. You cannot view other users’ batch summaries.
- Select ‘Requests’ followed by ‘My batch summary’
- All of your processed batches will appear on this screen
- To view the details for individual batches, select ‘View summary’
- You are also able to view the individual requests by selecting one of the four options in the ‘Outcome’ field:
- Requests approved: A summary of the number of requests that have been successfully approved
- Invalid requests: A summary of the number of requests that are invalid and haven’t been successfully processed
- Queued closures: A summary of the number of queued closures processed i.e. closures that have been scheduled to process on a future date
- Superseded closures: A summary of the number of closure requests that have overwritten existing closure requests in the system. For example, there is an existing closure request in the system to close a Direct Debit in six months and a closure request has been processed that will close the Direct Debit in two months. The new request for closure in two months will overwrite the existing request for closure in six months
- The list of individual requests will be displayed here. To view each request, select ‘Search’
Online Presentment
The allpay Online Presentment (AOPP) is one of the ways you may set up Direct Debit collections for your customers.
It is a simple and intuitive process, initiated by your own website and allows you to start collecting quicker and with reduced set up administration costs.
Once initiated, your customer is redirected to allpay’s secure server to complete the transaction. The AOPP may be customised using 'templates', which are hosted on the allpay server.
Please speak to your allpay Client Development Manager for further information.
Important Information about Online Presentment
- allpay will host the webpage
- allpay Online Presentment (AOPP) can be configured to display your logo and colours
- Data will need to be shared between your customer portal and AOPP (please see the Post information in the appendix)
- All Direct Debits set up via online will go through the approval process
- The payment details can either be passed to allpay in the AOPP post or added into the allpay Portal at the approval stage
- allpay only supports Internet Explorer 9 and later versions, however, testing has shown the application to work on other browsers
Creating a New Direct Debit Mandate
Your customer will be presented with the following screens to complete their Direct Debit setup.
The screenshots in this document are for illustration purposes only.
Bank Account Ownership
Your customer will only be able to proceed with setting up a Paperless Direct Debit mandate if they have the authority to do so.
Otherwise, they will be given the option to print a DDI mandate to complete manually and return to you.

Billing Address
If your customer signifies that their billing address is not the same as the posted one, they will be prompted to complete the billing address details.

Frequency and Preferred Payment Date
If this information was not provided in the post, your customer may select the frequency and the preferred collection date.

The following rules apply to this screen:
- It is assumed that your customer is setting up a Direct Debit to collect regular payments
- It will only be shown if the information was not sent in the original post
- The frequency will be selected from the drop-down, only frequencies allowed on the scheme will be displayed
- For weekly, fortnightly and four weekly frequencies, only Monday to Friday dates may be selected
- For monthly and above frequencies, the selected date will indicate the actual date the initial payment should be collected. For example:
- Selecting 15/08/2022 as the selected date on a monthly frequency will collect the initial payment on that date and the 13th of each month thereafter. If those subsequent dates fall on non-working days, the collection will take place on the next available working day
- Selecting 14/08/2022 (A Sunday) will collect the initial payment on 15/08/2022 and all subsequent ones on the 14th of each month thereafter. Working day rules apply, as above
- For frequencies up to and including 4 weekly, and also single and dual payments only, the date will indicate when the initial payment should be taken, and the actual day of the week will be used for subsequent payments. If a non-working day, the allpay Portal will amend it to a working day before approval stage and subsequent dates will be dealt with by the system as per standard processing
- For example: A weekly frequency selected date is requested for 17/08/2022 (a Wednesday). The initial collection will be on that day. All subsequent collections will take place on every Wednesday, assuming ongoing payments, and these will be finalised at the approval stage. Details of the actual payments themselves will be added by the client at the approval stage via the allpay Portal
Bank Account Details
Finally, your customer will be prompted to complete their bank account details.
Full bank modulus validation will be carried out at this stage. An error message will be displayed if the input details fail validation.
Online Help Information
The Online presentation process provides a help facility. By clicking on the “help” wording, a sidebar will display several selectable items (Contact details, online content-driven help instructions).
Confirmation
The final step, before the details are sent to the DD Portal, is for your customer to confirm the details are correct. The confirmation page also displays the Direct Debit Guarantee.
This page will also be available for your customer to print before they confirm.
The screen wording will be dependent upon the options chosen whilst setting up the Direct Debit and will reflect this. The example below illustrates the wording for a monthly Ongoing Direct Debit.

Approving Online Requests
Once your customer has confirmed that all details are correct, the Direct Debit will be created on the allpay Portal, awaiting approval by an authorised user. If the optional fields were not populated online, they will default to the following values:
- Initial payment amount: Zero
- Subsequent payment date: Calculated from the frequency and initial payment date
- Subsequent payment amount: Zero
- Fixed or ongoing: Ongoing
A full edit will be available for Direct Debits which were set up via the online route.
Only users with the approval role for the scheme may edit and/or approve these records. For details of how to approve and edit these requests, please see Requests - How to approve.
Annual Amendments - File Exports
To facilitate bulk amendments such as annual increases and decreases, a file export option is available to enable you to export your files which could contain multiple records. This is particularly beneficial for bulk amendments such as annual increases/decreases.
This file format does not support rent free weeks (payment holidays) - information for this can be found here.
If you are looking to combine both amendments and payment holidays you can find information on this process here
Exporting your Files
- Select ‘Files’, followed by ‘File export DD’

- Select a ‘Client code’ from the drop-down list, followed by ‘Amendment type’ ‘Bulk amendment’
You will only be able to export one client code at a time.

- Select the ‘Effective Date’ from the calendar. This is the date you want the amendments to take effect from e.g. 1st April. You are not able to change the effective date in the file after export
- Select ‘Export’ to export the file to an Excel spreadsheet
Note: The exported file will display all live direct debits from the effective date. If any rows are highlighted, this indicates there is data that we cannot display, such as future changes to an individual Direct Debits. We advise you to review these Direct Debits separately via the portal before amending the file. Remove any records not required from the file by deleting the rows on the spreadsheet.
Anyone with the ’File import/extract’ role will be able to export files.
- Once you have prepared your file you will be ready to import it
Special characters: We do not allow the following characters so please ensure none of the below are present in your file prior to importing:
- Non-visible characters such as tabs.
- ", ?, [, ], {, }, (, ), +, =, %, *, `\<, \>(to match Bulk Import)
- We do not allow the first character to be a comma ( , ), however we do allow a comma to be anywhere.
- We do not allow the first character to be a single quote ( ' ), however we do allow a single quote to be elsewhere. E.g. O'Leithead
-
The Direct Debit portal blocks the grave accent / back tick character ( ` ) when used as the first character in most fields.
File Imports
To facilitate bulk updates and closures of Direct Debits, a file import option is available to enable you to import a file which could contain multiple records. Providing the file supplied conforms to the appropriate formatting rules (see ‘Appendix – Direct Debit File Import Format’), the allpay Direct Debit portal will accept the imported file and produce a report on screen.
The allpay Direct Debit portal file import function can accept Microsoft® Excel (.xlsx), CSV and .txtfixed-length ASCII format files. For specific file import formats, see the ‘Appendix – Direct Debit File Import Format’, alternatively contact the Direct Debit Team to obtain further information.
You must allow the required advance notice before the effective date.
Importing a File
- Select ‘Files’, followed by ‘File import DD’

- Select ‘Browse’ to choose your file
To access our Help and Frequently Asked Questions page, you can select the ‘Help and Support’ option.

- Next, select ‘Import’ to import the selected file. Alternatively, select ‘Cancel’ to browse for a different file
- Any errors with the file format will be displayed on the screen before the file is imported and ready to process. At this point, no requests have been submitted or processed
- Once completed, a summary screen will be displayed
You can action the valid and invalid requests at a later date. The details are stored in the ‘File summary’ area of the portal, which is covered in the next section of this guide.
Viewing and Processing Records
- Select one of the ‘records’ from the ‘Outcome’ column options. All of the options are detailed below

Record Ready to Submit
This will contain the records that have been initially validated and are waiting to be processed.

- Records can be filtered by selecting the ‘Record Type’ drop-down box at the top of the screen
- To view the original details, select ‘Open’
- To submit all records, select ‘Submit all records’. Alternatively, you can select ‘Cancel all records’ to cancel all requests waiting to be submitted

- You can also select individual records to process using the checkboxes on the right-hand side of the page. You can then select ‘Submit selected records’ to process, or select ‘Cancel selected records’ to cancel

Records Unable to Submit
This will contain the invalid records, and you will not be able to submit and process.
Important: Paperless Direct Debit clients are unable to edit invalid & valid new records.
- Records can be filtered by selecting the ‘Record Type’ drop down box at the top of the screen
- To view the original details, select ‘Open’
- To cancel all records that have failed validation, select ‘Cancel all records’

- You can also select individual records to process using the checkboxes on the right-hand side of the record. You can then select ‘Cancel selected records’ to cancel the selected requests
Rectifying Invalid Records
A record can become invalid for a variety of reasons, for example:
- Incorrect client code
- Incorrect payment dates
- Incorrect data formats
The allpay Direct Debit portal provides an error reporting function that highlights the fault that deems the record to be invalid, thus making rectification easier and quicker.
- Click on the ‘records unable to submit’ in the ‘Outcome’ column
- The summary of the invalid records will be displayed, at this screen click on the ‘Download Error Report’ box.

- Click ‘Ok’ to proceed

- Click ‘Yes’ to remove the records, this will change the status to cancelled. If ‘No’ is selected the unprocessed records will remain on the system marked as ‘invalid'

- When the spreadsheet has opened, browse to the end of the row [normally column K]. This will detail the error(s) that the file upload process has discovered

- Using the information found for each record, the spreadsheet should be altered accordingly and resubmitted. In this example, an error has occurred with the payment amount(s)
- At the Imported records screen the outcome will display the status for records. In this example, the invalid records have been cancelled, which would amend the ‘Records unable to submit’ and ‘Cancelled records’ display

Submitted Records
This will contain the records that have been submitted to process in the previous step

- Records can be filtered by selecting the ‘Record Type’ drop down box at the top of the screen
- To view the original details, select ‘Open’
Cancelled Records
This contains the records that have been cancelled:
- Records can be filtered by selecting the ‘Record Type’ drop down box at the top of the screen
- To view the original details, select ‘Open’. In this example, the detail of the record shows the Initial payment date was not a working day
File Summary
The file summary section will hold details of all previous file imports that have been loaded into the system:
- Select ‘Files’, followed by ‘File summary’

- You will now be presented with options to search for imported files
- Select ‘File status’ from the drop-down box

- Select the username from the drop-down box. By default, ‘All’ users will be selected
- Once you have entered your search criteria, select ‘Search’, or ‘Reset’ to remove all search criteria
- A list of applicable files will now be displayed
- Select ‘View’ to see the full summary for the imported file
My Batch Summary
This section will detail the cancellations and submissions that have been processed in the previous steps. As a result, one file can contain MULTIPLE batches. For example, if a file has been loaded and 50 records were valid and submitted, and 50 records were invalid and cancelled, each of these steps would be logged as two separate batches; one batch for the submission and one batch for the cancellation.
A user is only able to view their batch summary.
Viewing Batch summaries
- Select ‘Files’, followed by ‘My batch summary’

- A summary page containing all of the batch processes is now displayed on the screen

- A breakdown of the summary page is as follows:
- Created on – The date and time the batch was created i.e. when the ‘Submit‘ or ‘Cancel‘ option is selected
- Completed on – The date and time the batch completed processing
- Batch Status – The current status of the batch, which can be one of the following:
- 'In Progress’ This is when a batch is still running
- ‘Completed’ This indicates when a batch has finished processing
- ‘To submit’ when the file has finished processing but not all of the records have been submitted
- Type – There are two types of submission: ‘Cancellation’ or ‘Submission’
- Filename – The original name of the file that was imported into the system
- Progress – Here you can select ‘View summary’ to view the complete submission summary
- You can scroll through multiple pages using the navigation buttons at the bottom of the summary screen

- To view the complete summary, select ‘View summary’ from one of the available batches
- The following screen will be displayed. The number of records processed are broken down into categories and summarised below
- To view the file summary, select ‘File summary’. This will give you a complete overview of the file that was originally imported

File Export Function
The file export function can also be used for the following purposes:
Exporting account records
- Go to 'Search' and 'Account'
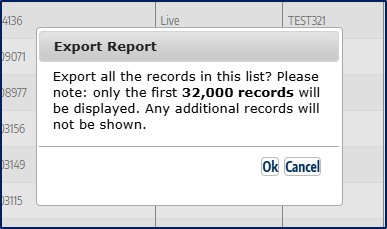
- Select the Client Code then 'Search'
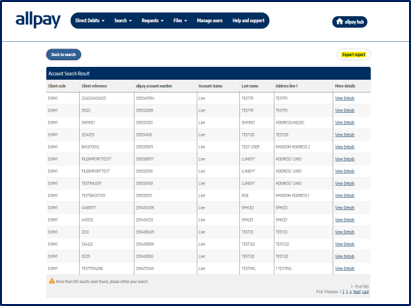
- You can now select 'Export' to export your data
Payment Holidays
If your organisation offers payment holidays or rent-free weeks, you can manage these within the portal provided your scheme has been enabled for payment holidays.
Speak to your allpay Client Development Manager for more information on this feature.
Export your file
The process involves exporting live Direct Debits from your client code, with the dates of the payment holiday(s)
- On the home screen, select 'Files', then 'File export DD'
- Select the client code you want to export the data from, using the drop down list (if you only have 1 client code, this will already be selected)
- Select the amendment type as 'Payment Holiday'

- For the 'Effective date start' use the calendar to select the start date for the payment holiday
- For the 'Effective date end' use the calendar to select an end date for the payment holiday
For example: A payment holiday is scheduled for the week over Christmas, so the start date would be Monday 22nd December, and the end date would be Sunday 28th December
- Now 'Export' your file
- Open your file in the 'Export history summary' and save your file to your chosen location

The exported file will display all live Direct Debits from the effective date. If any rows are highlighted, this indicates there is data that we cannot display, such as future changes to an individual Direct Debits. We advise you to review these Direct Debits separately via the portal before amending the file. Remove any records not required from the file by deleting the rows on the spreadsheet.
Anyone with the 'File import/extract' role will be able to export files.
Preparing Your Files
You will need to prepare your Excel file prior to importing back into the portal:
- Review any highlighted files in the portal, and if required, delete the row(s) from the spreadsheet
- Delete any rows that are not applicable to the payment holiday
- With the remaining rows, no changes are required – just save the file ready to import
The file import will fail if any special characters are detected. These include:
- Non-visible characters such as tabs.
- ", ?, [, ], {, }, (, ), +, =, %, *, \<, \>(to match Bulk Import)
- We do not allow the first character to be a comma ( , ), however we do allow a comma to be anywhere.
- We do not allow the first character to be a single quote ( ' ), however we do allow a single quote to be elsewhere. E.g. O'Leithead
Importing Your File
To import your file, please follow the File Import process which can be found here:
Once the file has been imported successfully, a letter (or email) will be sent out advising those customers affected of the payment holiday.

Cancelling a Payment Holiday
If you needed to cancel the payment holiday, this can done in the customer account screen for individuals or in bulk for multiple cancellations.
To cancel an individual payment holiday, select the option to 'Cancel payment holiday' in the banner on the account screen and confirm by selecting 'Ok'.

A letter (or email) will sent to the customer confirming the cancellation of the payment holiday.
If the banner is red, you cannot cancel a payment holiday as you have already reached your advance notice period and this can no longer be changed.

Hover your cursor over the 'Why can't I cancel?' text and a message will pop up detailing why you can't cancel.

Cancelling Payment Holidays in Bulk
To bulk cancel payment holidays, you will first need to export the data.
The process involves exporting live Direct Debits from your client code, with the dates of the payment holiday(s):
- On the home screen, select 'Files', then 'File export DD'
- Select the client code you want to export the data from, using the drop-down list (if you only have 1 client code, this will already be selected)
- Select the amendment type as 'Payment Holiday Cancellation'
- For the 'Effective date start' use the calendar to select the start date for the payment holiday
- For the 'Effective date end' use the calendar to select an end date for the payment holiday
The data will only show payment holidays that were created with the same start and end date entered for this extract.
- Now 'Export' your file
- Open your file in the 'Export history summary' and save your file to your chosen location
- Review the file data, and remove any records that do NOT require a cancellation i.e. Remove anyone who doesn't need their payment holiday cancelling, and leave only those who do need it to be cancelled in the file
- Save the file and import back into the portal
- Once imported, a letter/email will be generated and sent to the individual detailing the payment has been cancelled, and their updated payment schedule
Payment Holidays and Annual Amendments Combined
If you need to action a bulk amendment and a payment holiday within the same extract, please follow the steps below:
- Select the extract type as Bulk Amendment with Payment Holiday
- Enter the Effective date for the amendment then the Start date and End date for the payment holiday
- Export the file
- Remove any records that do NOT require an amendment and payment holiday

The file will only display data for accounts with payments due within the selected payment holiday date range.
If you only want to apply a payment holiday, the amounts can remain the same.
If you only want to apply an amendment then follow the Bulk amendment process.
- For the remaining records, update the Next Collection Amount and Subsequent Collection Amounts columns and save
- Importing the file back into the portal will apply a payment holiday for the date range selected at export as well as the amendment to their collections
- Once imported, a letter/email will be sent to the individual detailing both the amendment and the payment holiday period
When using the Combine process, please be aware that if the amendment’s effective date falls within a payment holiday period, the amendment will not be applied until the payment holiday has ended. The updated next collection date will appear in the extract.
For details about unsupported characters in uploaded files, please refer to the File Import section for guidance
The Direct Debit Collection Process
allpay’s collection of Direct Debits from your Payers is administered in an accurate and timely manner. The collection process includes the preparing and handling of Bacs submissions, the reconciliation of amendments, cancellations and advice on error recovery. This process starts when the Direct Debit Instruction (DDI) has been successfully lodged with the Payer’s bank.
We will collect payments on the date requested by you or within three working days of the given date.
The Bacs Cycle
Bacs is a scheme for the electronic processing of financial transactions. Direct Debits are collected using the Bacs system. Bacs payments take three working days to clear; they are entered into the system on the first day, processed on the second and cleared on the third.
allpay receives Bacs generated reports daily, providing information on processed, rejected, returned, amended and cancelled Direct Debits / DDIs.

Direct Debit Instruction Amend Bank Details & Cancellation At any time, the Payer can choose to amend their bank details or cancel/close their Direct Debit by giving their bank branch authority. This will be effective immediately. allpay will also receive this information.
Paying Bank Generated
Having received notification from the Payer of a change to the DDI, the paying bank will inform allpay. This notification will either be issued manually or, more often, electronically using the Automated Direct Debit Amendment and Cancellation Service (ADDACS).
Amendments to the DDI may arise as a result of:
- The cancellation of the DDI
- The transfer of the Payer’s account to another branch of the same bank
- Cancellation of the DDI due to the Payer transferring their account to a different bank
- Written authorisation from the Payer to their branch of a change of details to their DDI, e.g. change of account name or number, within the same bank
- While not a permanent amendment to a DDI, the Payer may dispute the Advance Notice given which may result in a payment being suspended until the dispute has been resolved
- Any one of the other ADDACS reason codes shown in the table below:

Following advice from the Payer or paying bank that the Payer has closed the account or transferred to another bank, new account details must be obtained from the Payer. However, where the Service User has received advice from the bank with reason code 3, quoting both old and new paying bank details, a new authority is not required.
allpay will automatically generate a standard letter following receipt of amendment advice from the paying bank. In such circumstances, we may continue with this process providing the signed DDI is set up correctly.
Payer Generated
The Payer themselves may, alternatively, wish to advise allpay or you, our client, directly via written or oral cancellation of their DDI.
allpay will apply the changes and advise the Payer to notify their paying bank. As always, if you have any further questions about a Direct Debit amendment or cancellation, contact a member of our Direct Debit team.
Return of Unpaid Direct Debits
Unpaid Direct Debits are normally returned electronically by the paying banks, debited to allpay’s account on day five or, in exceptional circumstances, day six of the cycle. Each returned record will, like an amendment or cancellation, include a ‘reason code’. A negative cash file via the Payments Hub - File Manager will inform you of this. It is then up to you to liaise with the Payer to arrange an alternative payment method.
Reasons for Return of Existing Direct Debit Instructions
A Direct Debit may be returned unpaid for a variety of reasons, detailed below with the appropriate code:

Return of Unpaid Direct Debits
The advice of Incorrect Details
Where the Payer’s sort code and/or account number has not been correctly detailed on the Direct Debit payment, the paying bank may apply for the payment and provide advice of the correct details to allpay.
Reinstatement Advice
A Payer may request that their paying bank reinstates a DDI up to two months following cancellation.
Payer Cancellation of Contract direct with allpay
Where a Payer has given advice directly to allpay to cancel their contract, this will be taken as cancellation advice for the Direct Debit Instruction (DDI). If a customer owes existing funds to you in respect of their contract, you must liaise directly with your customer to establish alternative methods of payment for outstanding funds.
Indemnities
Under the terms of the Direct Debit Guarantee, a Payer is entitled to an immediate refund if an error has been made either by allpay or the paying banks. This includes any errors relating to:
- The payment due date and frequency
- The amounts to be paid
- Payments made after an instruction given to cancel a DDI
If the Payer approaches allpay or you, our client, directly regarding an error, we will, and we advise that you should, refer the Payer to the paying bank, or contact the paying bank, asking them to raise an Indemnity Claim.
allpay advises its clients not to settle a payment error directly with the payer, as they may still utilise the indemnity claim via their banks.
Applying for Rent Free Weeks (with or without Annual Increases/Decreases
If you are making bulk amendments that include applying rent free weeks i.e. Payment Holidays, please go to the Payment Holidays section here.
See File Imports for further details on standard bulk amendments such as annual increases and Payment Holidays.
Client Responsibilities
It is the responsibility of you, our client, to verify your customer and validate their details, i.e. identity, account details and customer address.
Also, you, as our client, must consider the wider reputation issues for the scheme, particularly concerning the risk of fraud. This form of Direct Debit may not be suitable for some transactions, e.g. High-value payments.
Appendix
Direct Debit File Import Format
Validation Rules
When files are imported into the allpay Direct Debit system, validation checks will be completed. These checks ensure the imported file complies with the following validation rules:
- No field should start with spaces. (This does not apply to an optional field that has been padded out with spaces)
- All mandatory data fields must contain data
- No field should exceed its fixed field length. Excel and CSV imported files will truncate field details if maximum field lengths are exceeded
- All fields are left justified except for the payment amount in the Direct Debit file formats Unaccepted characters include: ? [ ] { } ( ) + = % * < > "


Online Presentment - The Posts
Initial Post
To utilise the AOPP, clients must insert certain hidden fields into a form that redirects to the AOPP over a secure link. The following fields make up the post message.


Optional / Conditional: The conditions listed below define the ONLY valid criteria for the optional/conditional data. “0” or spaces are treated as values, therefore should only be sent where valid (Number of payments for example). Where a field is not required, it must not be posted.
If any fields contain invalid data, either format or conditional, an error will be returned and the Direct Debit Setup page will not be shown.
Conditional criteria (When posted):
- All payment data (dates, amounts and frequency) need not be posted. In this case, only the basic mandate information will be set up
- Frequency must be valid according to the scheme rules
- Initial Payment date must be > the required advance notice period, exclusive of the current date
- Subsequent Payment Date must be => than Initial Payment Date + 1 Day (Need not be a working day for monthly or above frequencies)
- If Number of Payments = 1: Initial Payment Date and Initial Payment Amount MUST be posted, All other optional fields MUST NOT be posted
- If Number of Payments = 2: Initial Payment Date and Initial Payment amount Must be posted, Subsequent Payment Date and Subsequent Payment Amount MUST be posted, Frequency MUST NOT be posted
- If Number of Payments = 0 (Ongoing): All optional fields MUST be populated
Initial Post Format
The client webpage must insert certain hidden fields into a form that redirects to the allpay Online Presentation Page over a secure link. The originating page, which contains the form, performs the post request and is known as the “referring URL”. This URL needs to be emailed to implementation@allpay.net so that it can be added to the whitelist of permitted referring URLs.
A typical implementation of the post request, providing the full data requirement, is shown below:


A typical implementation of the post request, with the minimum data requirement, is shown below:

Notes:
- The allpay URL is https://directdebitsetup.allpay.net
- The application token will be provided at a later date
Response Post
Response data is sent back to the supplied response URL from the request post for each transaction. allpay clients can then use this response to update their database and send emails to their customers based on the result of the transaction.
The response fields are as follows:


Supported browsers are: IE9 and later versions. The application should work in other browsers; however, these are not supported by allpay.
Set up Requirements
Set up Data Requirements
The following CSS data defines the technical information required by allpay to set up the client-specific customisation on the allpay system. The example below shows the detail colours.


Client Logo
A client may opt to have their logo in the top left-hand side of the screen. This must be provided before thesite is live. Parameters for the logo are:
type: png transparent
size: 210w x 127h
Paper DDI Form PDF
When a customer is unable to set up a Direct Debit online because they are either not the sole owner or signatory, they will be able to print a blank Direct Debit Instruction, which they will need to complete and return to the client.
For allpay to set this PDF up, the following information must be provided by the client:
Bureau Client:
- Logo
- Name to appear on the DDI
- Address
- SUN
Non-Bureau Client:
- Name to appear on the form (I.E, acting on behalf of……)
- Company name and full address
Testing Requirements
Testing requirements, which are a prerequisite to going live will be agreed between allpay and the client.
Sign off Requirements
To be agreed between allpay and the client.
Live Status
Before any client Online Presentment process can be granted a live status, it must go through the testing stage and both parties must have signed this off as completed satisfactorily. allpay will set a flag on the URL during this phase, which will automatically negate any data from being written to the allpay databases, therefore, no test data will be stored on the allpay Portal.
When all testing has been completed and the system has been signed off as ready for life, it will be switched to a live status, which will allow DDs to be authorized and sent to BACS for processing.
Post Live Achievements
Any issues, or additional features which may be requested, must be sent to allpay by sending them to the Support team. Details below.
Once live, it will be possible to create and test modifications to the client website. allpay will provide this facility. Please contact us using the details below for details as and when required.