
Direct Debit User Guide: Manage Direct Debit
Logging In and Getting Started
Search for an Existing Direct Debit Account
Viewing Existing Direct Debit Account Details
Customer Communications - Email Notifications
Payment Notification via Email and/or SMS
Set up Rules and Bacs Requirements
Introduction
The purpose of this user guide is to illustrate the Manage DD permissions of the allpay Direct Debit portal that you will use daily.
By using this guide a user will be able to complete the following tasks:
- Access the allpay Direct Debit portal
- Log on to the allpay Direct Debit portal
- Create a new Direct Debit
- Search for an existing Direct Debit
- Amend an existing Direct Debit
- Close a Direct Debit
- View Failed payments
For details on File Import/Export and Senior DD permissions please see the complementary document “Senior DD guide”.
Accessing the allpay Direct Debit Portal
To access the allpay Direct Debit portal please use the website address https://login.allpay.net
What are Direct Debits?
Direct Debits are a simple, flexible, and automated method of payment collection. A new Direct Debit may be set up in one of two ways:
- The primary method involves completing a Paperless mandate via telephone or in person with the customer
- The secondary method is by customer completion of a paper mandate
Key Information about Direct Debits
- Only set up a Paperless Direct Debit when you are dealing directly with the bank account holder
- If at any point you are unable to proceed with a Paperless Direct Debit, a paper Direct Debit mandate may be used
- If the bank account requires joint signatories, the DDI (Direct Debit Instruction) must be paper-based and signed by both signatories
- Advance notification is required when processing all new Direct Debit instructions. This period must include two further working days to allow for the postal system to deliver the Direct Debit creation confirmation letter or email
- Advance notification is required to process all changes to the amount, date, or frequency of the Direct Debit. This period must include two working days to allow for the postal system to deliver the amendment confirmation letter or for the email to be sent
- The initial collection date must be a working day
- A Direct Debit may be closed at any time. If the Direct Debit collection has entered the BACS cycle (three working days before the collection date), the final collection cannot be cancelled but the customer can contact their bank and attempt to stop the payment themselves
- If closing and re-opening a Direct Debit on a Bureau scheme, the minimum time required between the two actions is 1 working day
Logging in and Getting Started
Log into the Payments Hub and navigate to Direct Debits. If you don’t have access to the Payments Hub please speak to your administrator.

Setting up a New Direct Debit
This section details the 5 steps required to complete the set up of a new Direct Debit Instruction. When creating a new Paperless Direct Debit Instruction (DDI), each step contains a script for you to follow.
If the script has a red asterisk next to it, it must be read out loud to the customer as it is written. If setting up a Paperless Direct Debit using a paper mandate, the script will not be required.
In either case, the following steps must be completed to create a new Direct Debit:
From the ‘Direct Debits’ menu at the top of the page select ‘New DD’ or select the ‘Create a DD’ quick link

From the next screen, select the 'Client code’ from the drop-down box. This is the scheme you want you set up the DDI on.

Step 1: Customer Details
A red asterisk next to a mandatory field indicates that the setup process cannot continue if the field is not completed. You cannot continue the setup process if you do not populate these fields.

You must ask the customer the 3 scripted qualifying questions before you can proceed in setting up a Paperless Direct Debit Instruction (DDI).
If ‘No’ is selected for any of these questions a follow-up message will be displayed to inform the user that a Paperless Direct Debit cannot be processed, and a paper mandate must be completed. Once the customer has completed and signed the paper mandate you can set up the Direct Debit on the portal.
- Enter your customer’s ‘Client reference’. Examples of this include the customer and Tenancy Reference number or Council Tax reference. The reference entered here will be used to identify your customer and when notifying you of payments made by them (references may contain a maximum of 16 alphanumeric characters, including special characters). You can change this reference at any time in the customer contact details
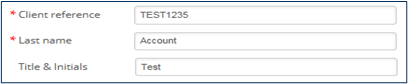
- Enter your customer’s ‘Last name’
Once you have populated the ‘Last name’ field the portal will perform a check on whether the combination of stated Client Code, Client Reference and Last name is already on the portal. If a match is found the address details will be populated and the user will be required to confirm, amend, or enter new details. If an account already exists with a live Direct Debit, the user will be able to view the Direct Debit or enter new details. You cannot have more than one live Direct Debit with this combination.
- Enter your customer’s ‘Title &Initials’
- Enter your customer’s address. This is the address of the property where the customer resides. Please enter the full address, paying attention to the Postcode
- Select ‘Next’ to continue to the next step
Step 2: Bank Details
This first question asks if the person paying the Direct Debit is different from the customer setup in Step 1.
1. If the customer and bank account holder are the same person, there is no difference so select ‘No’ and the details supplied in Step 1 will be copied over to the ‘Bank Account Holders Details’. If someone other than the customer is the bank account holder for the Direct Debit setup and therefore different, select ‘Yes’ and enter the payer’s name and full address in the ‘Bank Account Holders Details’ section
The Direct Debit Setup confirmation letter will be posted to the Account Holder address.
If your client code is set up for SMS notifications, you will have the option to add the bank account holder's mobile telephone number at this stage too.

Under the ‘Bank Account Holder’s Details’ enter the ‘Last name’, ‘Title & Initials’, and their ‘Address’. Then enter the ‘Name of account holder’, ‘Sort code’, and ‘Account Number’
If the account to be used is a business account, tick the box to confirm this is a business account. This supports with the accuracy of the PNV check.
The sort code and account number details will now be validated using a modulus and PNV (Payer Name Verification) checks, and an error message will be displayed if the supplied details don’t match.
Invalid
Occurs when the sort code is set up for PNV and the account details are incorrect

Unavailable
Occurs when the account has opted out of PNV, or is not supported for that sort code

Partial matches
Occurs when a partial match is found (see next 3 images)


Valid
When details match

The payer should be asked if they have used this account to make Direct Debit payments before. Select either ‘Yes’ or ‘No’ and then select ‘Next’ to continue
This isn’t a qualifying question so you can select no, this question helps to identify if the account the customer is using for the Direct Debit is suitable as some accounts don’t allow Direct Debits (such as savings accounts or basic card cash accounts).
Step 3: Contact Preferences
In this step you can confirm the preferred method of contact for the bank account holder. The default communication method is via letter so this will automatically be selected in this step.

If your client code is set up for email correspondence, you can select 'Email' and then enter the email address for the bank account holder.
Email correspondence will only commence once the email address has been verified. See Customer Communications for further information.

If your client code is enabled for bilingual communication, the language preference is required.
You will then have the option to select the language:
- English
- Welsh (bilingual - both English and Welsh will be included in the communication)

Step 4: Payment Details
1. Using the calendar, select the ‘Initial date’, which will be the date of the first payment collection. Dates displayed in dark grey are available to use, and is based on your advance notice period.
Advance notification is required when setting up all new Direct Debit Instructions. This period must include an additional two working days to allow for the postal system to deliver the Direct Debit creation confirmation letter (or email).
Dates in light grey are unavailable and cannot be selected from the calendar. Use the arrows to the left and right of the month displayed at the top to move between the months
The date of the initial payment MUST be a working day.

2. Enter the ‘Initial amount’, which will be the amount taken for the first collection. This can be different to the ongoing subsequent collection amount

3. Select the appropriate duration for the Direct Debit. Choose from either:
‘Ongoing’ - payments will be collected on a frequency basis (frequency set by you) until the Direct Debit is closed or amended
Or
‘Fixed’ – this will allow you to set the number of payments (up to a maximum of 999) to be collected before the Direct Debit collections stop

4. If you select ‘Fixed’, another field will appear for you to enter the ‘Total number of payments’ which is inclusive of the initial payment. e.g. Entering a value of 10 will mean an initial payment and 9 subsequent payments

If you want to set up a one-off payment collection, select the ‘Fixed’ option and enter the number ‘1’ in the ‘Total number of payments’ box. The subsequent payment information and frequency will no longer appear on the screen.
5. Select the ‘Frequency’ of the payments from the drop-down menu. If the option you require is not available to you, please contact the administrator for the allpay DD portal within your organisation

6. Using the calendar, select the ‘Subsequent date’ field which will be the fixed date for all further payment collections. Only dates displayed in dark grey are available to select

If the frequency is set for either weekly, fortnightly, or 4 weekly collections, you must select a day of the week for collections (Mon-Fri). If the frequency is set for monthly, quarterly, six-monthly or annual collections, you must select a specific date in the month for collections. If the scheduled collection falls on a weekend or bank holiday, allpay will collect on the next available working day in accordance with Bacs rules.
7. Enter the ‘Subsequent amount’, which will be the amount taken for subsequent payments

8. Select ‘Next’ to continue
You can go ‘Back’ or ‘Cancel’ at any time during the setup process. If you chose to go ‘Back’ the portal will retain the information previously inputted. If you select ‘Cancel’ you will lose all the information for this instruction and the portal will take you back to Step1.
Step 5: Confirmation
1. The final stage requires the verification of information provided in previous steps:
You must relay the script to your customer:
- The script will contain details of how the Direct Debit payment will appear on the customer’s bank statement
- Confirm that the bank account number and sort code are correct before selecting ‘Yes’ or ‘No’
- To complete the process, select ‘Confirm’. If you wish to change any of the details provided, select the ‘Back’ option to navigate back to the relevant step. Should you wish to cancel, select ‘Cancel’ to clear all inputs and be taken back to Step 1

The Direct Debit will now be created and become live on the portal. If the Client Code is set up for approvals and the user does not have approver rights, then the Direct Debit will become live on the portal once it’s been approved.
2. Thank the customer for their time, and the following screen will now be displayed:

Choose either:
- 'click here’ to view or edit the Direct Debit
- ‘Main Menu’ to be taken back to the Welcome screen, or
- ‘Create New DD’ to be taken back to Step 1
Payment Holidays
During Step 4 of the DD setup process, if you wanted to add in a payment holiday at this step, you can follow the steps below.
For bulk upload of payment holidays, please refer to the Senior DD Guide
At Step 4 (Payment details), you will have the option to set up a payment holiday.

if you tick the Yes box, you will then need to enter the Effective Start and End Dates.

Select Next and continue to Step 5: Confirmation.
Pre-Schedule Accounts
Pre-schedule accounts - Important points to remember:
A pre-schedule account is used to set up a Direct Debit Instruction to capture payer details in advance of setting up a payment schedule. To find out more about Pre-Schedule accounts, please speak to your allpay Client Development Manager.
To set up a Pre-Schedule account on the allpay Direct Debit portal, follow Steps 1, 2 and 3 as per Setting up a new Direct Debit’, you will then be given the option to set up a payment schedule or select ‘Next’ to complete Step 5 the setup.
A Pre-schedule account will close if there is no activity on that account within 24 months of opening.
Payment schedules can be added at any time within 24 months of setting up the Pre-schedule account.
To set up a payment schedule on a Pre-Schedule account, you can add payment details via the customer account screen (see the section on adding a payment schedule).
Variable Direct Debits
Variable Direct Debits allow you to make flexible, ad-hoc collections whilst still utilising all the benefits of our Direct Debit portal.
A variable DD can be set up face to face, over the phone or online, and can be adaptable to your customers’ changing circumstances.
When setting up a variable DD, only the initial payment is required in the Payment details step, you can then add further payments as and when required through either manual input, bulk upload, or API.
For full details of Variable Direct Debits please speak to your allpay Client Development Manager.
Variable DDs must be on a separate client code to standard DDs.
Creating a New Variable Direct Debit
To create a new variable Direct Debit, follow the instructions detailed in Section 3 for Steps 1, 2 & 3 – Customer, Bank, and Contact details.
In Step 4 - Payment details, you will have the option to set up the initial payment only.
1. Using the calendar, select the ‘Initial date’, which will be the date of the first payment collection

2. Enter the ’Initial amount’ to be collected
3. Select ’Next’ to continue
4. Complete the set up in Step 5
Search for an Existing Direct Debit Account
1. From the ‘Direct Debits’ tab, select ‘Amend existing DD’

2. Alternatively, you can search for an account by selecting the ‘Search’ option from the top menu bar and selecting either the ‘Account’, ‘Direct Debit Reference’, or ‘Bank Account Holder’ option, or use the ‘Search for a DD’ quick link on the Home page
Using either the ‘Amend existing DD’ or the ‘Search’ option will allow for the same functionality.
3. You can search for existing Direct Debits using 3 different search criteria:
- ‘Account’ - You can search for an account by selecting the ‘Client code’ from the drop-down box and entering either the ‘Client reference’ or ‘Last name’

- ‘Direct Debit reference’ – You can search for an account by entering the ‘DD reference’. The customer can locate this on their setup or amendment letter/email

Selecting the ‘Live Direct Debits only’ checkbox will exclude closed or dormant Direct Debits.
Bank account holder’ - You can search for an account by selecting the ‘Client code’ from the drop-down box and entering either the ‘Account Name’, ‘Last name’, ‘Address line 1’, ‘Postcode’ or a combination of any of the above options. You must populate at least 1 field to search for an account. You can search for ‘Live Direct Debits only’ by ticking the box.

Please use the ‘Account’ search option if the bank account holder and account holder are the same people.
4. Select ‘Search’ to continue
5. From the ‘Account Search Result’ page, the list of applicable accounts will appear. Select the appropriate account by selecting ‘View Details’ to the right of the account you want to view

6. The next screen will show the ‘Direct Debit summary’, which at this stage will display any live and/or closed direct debits
7. The ‘Payment history summary’ will also be shown, which will show payments

Viewing Existing Direct Debit Account Details
1. To view an existing Direct Debit account, select ‘View Details’ next to the Direct Debit currently set up in the ‘Direct Debit summary’ section

2. The ‘Direct Debit summary’ screen will display the ‘Current payment schedule’, the ‘Future payment schedule’ and the ‘Payment history summary’
If a Direct Debit is created that only has one payment collection then only the “once only” collection will be shown.
3. An overview of the screen is as follows:
‘Current payment schedule’
‘Amount’ – The amount due to be collected
‘Next payment date’ – This is the date the next payment will be collected on
‘Previous payment date’ – This is the date the previous payment was taken
‘Frequency’ – The frequency of the payment collection i.e. Weekly, Monthly etc.
‘Collection day’ – The day Direct Debits are collected on. This will either be a calendar date for monthly, quarterly, six-monthly and annual frequencies i.e. 21st; alternatively, a day of the week i.e. Wednesday for weekly frequencies e.g. weekly, fortnightly and four-weekly
‘First payment date’ – The actual date the first collection for this DDI was processed
‘Total payments’ – The total number of payments to collect. If this is an on going collection, ‘Ongoing’ will be displayed here
‘Final scheduled payment date’ – If this is a fixed payment schedule, this will be the date the final payment will be collected. For ongoing payments, ‘Ongoing’ will be displayed
‘Payments requested’ – The total number of payments that have been collected so far for this DDI
‘Remaining payments’ – The remaining number of payments that are due to be collected. For on going payments, ‘Ongoing’ will be displayed here
‘Future payment schedule’
‘Amount’ – The Amount due to be collected
‘Frequency’ – The frequency of the payment collection i.e. Weekly, Monthly etc.
‘Collection day’ – The day Direct Debits are collected on. This will either be a calendar date for monthly, quarterly, six-monthly and annual frequencies i.e. 21st; alternatively, a day of the week i.e. Wednesday for weekly frequencies e.g. weekly, fortnightly and four-weekly
‘First payment date’ – The actual date the first collection is processed
‘Total payments’ – The total number of payments to collect. If this is an on going collection, ‘Ongoing’ will be displayed here
‘Final scheduled payment date’ – If this is a fixed payment schedule, this will be the date the final payment will be collected. For ongoing payments, ‘Ongoing’ will be displayed
‘Payments to request’ - The total number of payments that will be collected. If this is an on going collection, ‘Ongoing’ will be displayed here. This number may differ from the ‘Total payments’, depending on any conflicting payment schedules that occur in the future
4. To view the Bank account details, select ‘Bank account’ in the top right-hand corner. This will display the ‘Account Name’, ‘Account Number’ and ‘Sort code’

The customer’s Bank Details cannot be amended on the portal. If your customer wants to change the account the Direct Debits are taken from, you will need to close the existing Direct Debit and set up a new instruction with the new bank details.
5. To view the associated client code information, select ‘Client code’ in the top right-hand corner. You can view the ‘Status’ of the Client Code(Live, Pending or Closed), confirmation of the ‘SUN’ (Service User Number) that is associated with your scheme, and confirmation of the ‘Type’ of scheme

Amending Customer Contact Details
1. From the Direct Debit summary screen, the Customer Contact details can be viewed and amended by selecting ‘Contact details’ from the top-right menu

2. This will take you to a screen that displays the current address details on the portal where you can amend as required. The ‘Account holder details’ are the details of the person the Direct Debit has been set up for. The ‘Bank account holder details’ are the contact details for the bank account holder of the account the Direct Debit is currently being collecting from
In the 'Correspondence preference' section you are able to update or add the email address, and/or resend the verification email as well as set the language preference (if bilingual communication is enabled on your client code).

3. You can make changes to the client reference here too if required
4. Click ‘Save’ to save the changes or ‘Cancel’ to discard any changes
If you need to change the ‘Bank account holder details’ you will need to uncheck the ‘Use account holder details’ box. Select ‘Save’ for each set of address details that you amend.
5. To return to the Direct Debit details screen, select the ‘Return to DD details’ button in the top right-hand corner

Amend a Direct Debit Payment Schedule (Immediate Change)
A payment schedule contains details of payment collections, including initial and subsequent payments.
For initial setups, you will see 2 payment schedules; a one-off collection for the initial payment and an ongoing or fixed schedule for subsequent payment collections. Any future changes that are due to be applied can also be viewed on this screen. The user also has the option in this screen to:
- Edit and delete future payment schedules
- Add further payment schedules
- Complete current schedules
Deleting a future schedule is referred to as Cancelled. To delete a current schedule is referred to as Completed.
These steps are only to be followed if you want to amend an existing payment schedule which affects the next collection. If you wish to amend the payment schedule after the next collection, this will be a ‘Future Change’ so please see Adding a New Payment Schedule
1. To amend the Direct Debit payment schedule, select ‘Amend DD’ and select ‘Amend payments’ from the drop-down menu

2. This screen will confirm the payment schedules that are currently in place
3. To edit a payment schedule, select the ‘Edit’ symbol
If you edit a schedule that is currently set up for collection or currently collecting, the change to the next collection will be IMMEDIATE and may affect the next collection date or the date that the collection will begin. To schedule a change to the collection to take effect at a later date, please see the ‘Adding a New Payment Schedule’.

When making amendments, you must ensure you allow the required advance notice period before the changes take effect.
4. If you want to amend the date of the next collection, using the calendar select the ‘Payment date’ for the next collection

Dates displayed in dark grey only are available to use. Dates in light grey are unavailable and cannot be selected from the calendar. Use the arrows to the left and right of the month displayed at the top to move between months.
5. If you want to change the duration of the payment schedule, select the ‘Option’
‘Ongoing’ payments will be collected on an ongoing basis until the Direct Debit is closed or amended, ‘Fixed’ will define the number of payments you wish to collect before the Direct Debit stops collecting further payments

6. If you select the ‘Fixed’ option, an additional box will appear where you can enter the ‘Remaining payments to collect’

7. If you want to change the frequency of the collections, select ‘Frequency’. If you have chosen the ‘Fixed’ option and only selected 1 payment to collect, the option to choose the ‘Frequency’ will no longer appear

8. If you want to change the collection amount, you can edit the ‘Payment amount’

9. For any changes made, select ‘Apply’ to accept the changes or ‘Cancel’ to discard the changes
If changes are made to an existing schedule and there are other schedules due to take effect or are currently collecting, an orange warning triangle will show in the Total payments column against any affected existing schedules as a result of any amendments you have saved.
If the payment amount or date of a currently collecting schedule is edited (and confirmed) this will be deemed as a completed schedule and the edited payment will be deemed as a future payment.
10. The total number of remaining payments to collect on the old payment schedule can be viewed in the ‘Remaining payments’ column
11. The ‘Final scheduled payment date’ column displays the current payment schedule
12. You can undo any changes you have made at this point, just select ‘Undo’ for each line of the schedule you have changed, or ‘Undo all’ to undo all changes

At this stage, the changes have NOT been submitted to allpay to process. Please follow the ‘Confirming Changes’ steps to submit changes to allpay.
Delete an Existing Direct Debit Payment Schedule
1. Alternatively, if you want to delete a schedule, select the ‘Delete’ button against the applicable schedule on the right-hand side
2. A red circle with a minus sign will appear against the Row Number on the left-hand side to confirm the schedule that is due for deletion
3. To undo any changes, select the ‘Undo’ button on the right-hand side to reinstate the previously deleted payment schedule
At this stage, the changes have NOT been submitted to allpay to process. Please follow the ‘Confirming Changes’ steps to submit changes to allpay.
Adding a New Payment Schedule (Future Change)
This option can be used to schedule any future changes that need to be applied to Direct Debit collections. Changes to collections will take effect from the initial payment date that you specify:
1. To add a new Payment Schedule, select ‘Add payments’

2. Using the calendar, select the ‘Initial payment date’. Dates that are not greyed out can be selected and available to use. Dates in light grey are unavailable and cannot be selected from the calendar. Use the arrows to the left and right of the month/year to move between months

This is the date that the new payment schedule will start collecting from.
3. Next, enter the ‘Initial payment amount’

4. Next, select the ‘Option’. For ‘Fixed’ collections, you can then amend the number of payments to collect by entering a number in the ‘Total number of payments’ box

5. Select the collection ‘Frequency’ from the drop-down menu. If you have chosen the ‘Fixed’ option and only selected 1 payment to collect, the option to choose the ‘Frequency’ will no longer appear

6. Using the calendar, select the ‘Subsequent payment date’ to select the subsequent payday or date

7. Next, enter the ‘Subsequent amount’

8. Select ‘Apply’ to continue or ‘Cancel’ to return to the previous screen
A green circle with a plus sign will appear next to the new schedule to be applied and a yellow warning triangle will appear against any existing payment schedule that has been affected by the new payment schedule.

Using the above example, the existing payment schedule on ’Row 1’ is an ’Ongoing’ collection that collects on a ’Weekly’ frequency basis. The yellow warning triangle indicates that the new Payment schedules below will impact the current ongoing collection and that the ‘Remaining payments’ have now been updated from ‘Ongoing’ to ‘1’ and the ‘Final scheduled payment date’ has been updated from ‘Ongoing’ to ‘04/02/2021’, when the new payment schedule will then take effect.
Icon definition summary

The yellow triangle indicates a new payment schedule that will interrupt the current ongoing collection

The green circular positive sign indicates that a new schedule is to be applied at a future date
9. If you need to edit or delete any payment schedules, use the ‘Edit’ and ‘Delete’ options detailed in the previous steps in this guide
10. To undo any changes, select the ‘Undo’ button to remove the newly entered payment schedule
At this stage, the changes have NOT been submitted to allpay to process. Please follow the ‘Confirming Changes’ instructions below to submit the changes to allpay.
Confirming Changes
1. At this point, no changes have been permanently applied to the payment schedule. To confirm changes, you need to select the ‘Confirm applied changes’ button on the bottom left-hand side of the page or you can select ‘Undo all’ and all changes due to be confirmed will be removed

2. A confirmation box will appear, and you can select ‘Ok’ to apply the changes or select ‘Cancel’ to go back to the previous screen

3. The new ‘Future payment schedule’ will be displayed, including conflicts if appropriate. Again, you can check the total number of payments that are due on each schedule, including when the final scheduled payment is due for each schedule

If changes require approval by an Approver before they are sent to allpay for processing, you will not see the new payment schedule in the ‘Future payment schedule’ until the request has been approved.
Closing a Direct Debit
1. Select ‘Amend DD’ from the menu options at the top right, then select ‘DD closure options’

2. A note appears, stating that if a payment is due to be requested in the next 3 working days before the closure date, closing the Direct Debit will not stop the payment request and the customer must contact their bank to stop the payment

3. Choose the appropriate option from the 2 that are available:
- Close immediately’ - Select this option if you wish to override all uncollected payments. Changes will take effect immediately and no further payments will be collected (there is no requirement to enter a date in the date field if this option has been selected)

- ‘Set a future close date’’ - Select this option to continue collecting payments under the original instruction. Payments will continue to be collected until the date specified in the ‘Date’ field

4. When complete, select ‘Confirm’ to accept and a confirmation box will appear. Select ‘Ok’ to accept or ‘Cancel’ to return to the previous screen.

5. You will now be taken back to the DD Details screen
6. If you selected ‘Close immediately’, the ‘DD Status’ will now appear as closed

7. If you selected a future closure, the future closure date will be displayed under the DD Status and the ‘Payment Schedule’ will be updated

8. The ‘Final scheduled payment date’ will now be updated with the final collection date, based on the date the closure is due to be processed and the ‘Payments to request’ will detail the number of collections remaining before the Direct Debit is closed
Once a Direct Debit has closed, the Instruction with the payer’s bank will be cancelled and you cannot reinstate it.
Amend or Remove a Future Closure Date
For a Direct Debit which already has a future closure date set, this can be either amended or removed by using the additional options provided:
- ‘Close immediately’ - Select this option if you wish to override all uncollected payments. Changes will take effect immediately and no further payments will be collected (there is no requirement to enter a date in the date field if this option has been selected) and any future closure date pending will be cancelled
- ‘Amend future closure date’ - Select this option if you wish to amend the date of an existing future closure (current future closure date shown by default). Payments will continue to be collected until the amended date specified in the ‘Date’ field

- ‘Remove future closing date’ - Select this option if you wish to remove an existing future closure. Following the confirmation, payments will continue to be collected asper the schedule

Events
The allpay Direct Debit portal offers an Event feature which has the functionality to display the customer’s Correspondence history, Full payment summary, and Future payment schedule.
To access the Event function:
1. Search for the customer’s Direct Debit account then choose ‘Events’

2. Select ‘Correspondence history’ from the drop-down menu

3. All correspondence that is related to the Direct Debit for the customer can be viewed by selecting the ‘View’ icon. A PDF version of the original will be displayed
4. If any letters have been returned undelivered, the ‘Returned reason’ will be displayed here
If you want to resend any correspondence to you customer, update any details then select 'Regenerate and send' and confirm. A new letter will be printed using the most up to date customer information and sent out to them (this includes an updated address or language change).

5. Select ‘Return to DD details’ to return to the customers' details
6. Select ‘Full payment summary’ to view the customers’ full payment summary detailing every payment and failed payment
7. Select ‘Future payment schedule’ to view the dates and amounts of the next 13 future payments
Customer Communications - Email Notification
If you have subscribed to email communication (to replace postal communication), you will need to capture the bank account holder's email address on the DD portal.
This can be done in several ways:
- New DDI – when setting up a new DD instruction you will be able to capture the bank account holder's email address in Step 3 of the process under ‘Contact preferences’
- Add to an existing DD – use the contact details section to add the email address
- Bulk upload – use the ‘Bulk email import template’ available in the ‘Help and Support’ section to bulk upload email addresses
- If any of your customers/bank account holders would prefer to receive letters rather than emails, please select 'Letter' in the correspondence section
If you would like to set up any of your DD client codes to include Email Notification, please speak to your allpay Client Development Manager.
Capturing an Email Address for a New DDI
1. Complete Step 1 and Step 2 of the new DDI process as usual and select ‘Next’ to continue
2. At Step 3 you will have the option to record the email address in 'Contact preferences'

3. Continue with the setup process to the end of Step 5 and once you have confirmed, the system will send an email to your customer asking them to verify their email address to receive an email notification in the future
4. A letter will still be sent out for the setup confirmation
Your customer must click on the email link sent to them to verify their email address and to confirm they can receive further communications via email, for us to utilise this communication method in the future. Until they verify their email address, allpay will continue to communicate via letter.
Capturing an Email Address for an Existing Customer
1. Search for your customer to view their account
2. Select ‘Contact details’

3. There is the option to capture the email address under the ‘Contact preferences’ heading

4. Select ‘Save’
5. The system will send an email to your customer asking them to verify their email address to receive all future correspondence in relation to their Direct Debit instruction via email
Your customer must verify their email address with the link provided. This will confirm they will receive all future correspondence in relation to their Direct Debit Instruction via email. Until the customer verifies their email address, allpay will continue to correspond via letter.
If the customer requires another verification email to be sent out to them, you can:
- Search for their account as above
- Select ‘Contact details’ then ‘Resend verification email’

Exporting Email Address Status
You can download an email status report directly from the portal which includes emails pending verification of where no email address has been supplied on live Direct Debits.
1. From the Search tab, select Email address status

2. Select the client code you wish to report on
3. Select the Verification status and select Search:
- All - all Direct Debits with verified email addresses, pending verifications, and those with no email supplied
- No email address supplied- these Direct Debits do not have an email address supplied
- Pending verification – this shows all Direct Debits that have an email address supplied but not yet verified by the customer
- Email address verified – this shows all Direct Debits that have an email address live and verified
4. You can export the search results to an Excel format, and/or view individual customer details as required
5. The export will show a list of records and their verification status

Email Notification Bulk Template
You can upload email addresses in bulk using the Bulk Email/Mobile Template which can be found on the training page here: Templates | allpay

1. Using the information gathered in the Export email address status report you can fill in the mandatory columns A, B, D and AD and save the file ready to upload
Note: The file names should not include any of the following: # % & { } \` < > * ? / $ ! ' " : @ or blank spaces
2. From the Direct Debit home screen, select File then File Import DD
3. Browse for your file and upload
4. The Imported records summary will display the outcome of the initial upload

5. Select the records ready to submit. You can now submit all or selected records, or cancel all or selected records
6. Once submitted you will be able to review your Imported records batch summary

7. Any records unable to submit will be listed and these can be viewed and exported to review the error/reason for submission failure

8. If required, changes can be made then resubmitted following the above process a gin
Payment Notification via Email and/or SMS
Payment notifications can be enabled for any of your client codes and can be used to send out payment reminders, failed payment notification, and re-presentment notification to customers via email and/or SMS.
To take advantage of this feature the customer’s account should contain the email address and/or their mobile telephone number.
We do not require the customer to verify their email address to receive payment notifications.
Details on how to capture an email address can be found in ‘Email Notification’.
For further details of payment notification please see the “Senior DD guide”.
Capturing a Mobile Telephone Number
You can capture a mobile telephone number for your customer in several ways:
- New DDI – when setting up a new DD instruction you will be able to capture the customers' mobile telephone number at Step 2 of the process under ‘Bank account holder details’
- Add to an existing DD – use the contact details section to add your customers’ mobile telephone number
- Bulk upload – use the ‘Bulk Email/Mobile import template’ available in the ‘Help’ section to bulk upload customer mobile telephone numbers
Failed DD Payments
Failed DD payments are scheduled collections that have been returned unpaid via BACS.
Searching for Failed Payments
1. From the ‘Search’ tab, select ‘Failed payments’

2. Select a ’Client code’ from the drop-down box, enter any further search criteria and select ’Search’
If a client code is enabled for re-presentment, the re-presentment date search criteria will also be displayed.

3. Review the list of failed payments. The ’Re-presentment date’ field indicates the date allpay will re-present the payment for collection

4. Select ’View Details’ to view an individual account
5. To export all the failed DD payments listed to an Excel spreadsheet select ‘Export Failed Payments’
Set-up Rules & Bacs Requirements
As an allpay user, you must ensure that you follow the script provided by allpay on the allpay Direct Debit portal for set-ups over the phone and face to face. This script has been approved by our sponsoring bank and Bacs. The use of this script shall ensure that the Payer has clear information and is left in no doubt that they have agreed to pay by Direct Debit and have set up a Direct Debit Instruction (DDI).
Collection& Validation of Payer’s Details:
- It is important for you, the user, to verify the identity of the Payer and their address, before the creation of any Direct Debits
- It is also essential that you, the user, obtain from the Payer, details of their bank account including the sort code, account number and account name
- You MUST confirm that the Payer is the only person to authorise debits from this bank account. This information will assist allpay in its compliance with the rules of our sponsoring bank and Bacs before we can submit the Direct Debit Instruction (DDI) to the paying bank
If the customer is not the account holder and therefore not the payer, or more than one person is required to authorise debits from the account, a paper DDI must be sent to the payer(s) for completion. The Direct Debit must not be set up until this paper DDI is completed and duly authorised by the payer(s). The original paper DDI MUST be sent to allpay.
- As you enter the Payer’s account details into the allpay Direct Debit portal, either on the telephone or face to face, our portal will automatically perform a ‘modulus check’ on these details. This will enable you to correct any invalid information
- During the sign-up process, you need to confirm to the Payer:
1. The first collection date
2. The frequency of the Direct Debit
3. The amount that will betaken
If at any stage the payer does not wish to proceed with the Direct Debit sign-up process, a paper DDI can be sent unless a payer withdraws from requesting a Direct Debit payment completely. As always, the Direct Debit Instruction must not be set up until a completed paper DDI, duly authorised by the payer, has been received by you, our client.
Confirmation of Payer Sign-up Direct Debit Instruction Creation
allpay will issue the Payer with a written Direct Debit confirmation letter within three working days of sign-up. The letter will include the Payer’s sort code, account number (the first four digits will be obfuscated), account name, Direct Debit Guarantee and reference number.
This confirmation letter incorporates the Advance Notice and will be received by the Payer no later than the required advance notice period before the first collection, [i.e. in advance of the account being debited].
As the confirmation letter and the Advance Notice are incorporated as one, it also includes the amount to be debited, first collection date, frequency and advance notice period.
Payer’s Records: For the protection of Payers, allpay will maintain archive records of all communications with the Payer, i.e. Direct Debit Confirmation Letter and Advance Notice.
Proof of dispatch of a confirmation letter incorporating advance notice is not proof of receipt by the payer.
We will maintain information for all your Payers’ current records. This will cover information in respect of:
- Creation of new Direct Debit Instructions
- Amendments and cancellations
- Records of amounts and dates of payments collected including identification of initial and final Direct Debits
Contact Information
allpay provides a wide range of support services which covers all aspects of the business and its products and services. Normal office hours at allpay are 8:00 am to 8:00 pm Monday to Friday:
Contact details can be found on our website: Contact | allpay