
Gateway Plus User Guide
Introduction
Gateway Plus provides your organisation with a fully hosted payment page. You can link the page from your website or application and, where included with your Gateway Plus service, customise and embed it to meet your organisations needs.
This guide explains how to access Gateway Plus, understand the functionality available to you, configure your payments page and make it available to customers.
Accessing Gateway Plus
You access Gateway Plus through the Payments Hub.
To access Gateway Plus:
- Log into the Payments Hub
- Select Payments from the main navigation.
- Select the Gateway Plus tile.
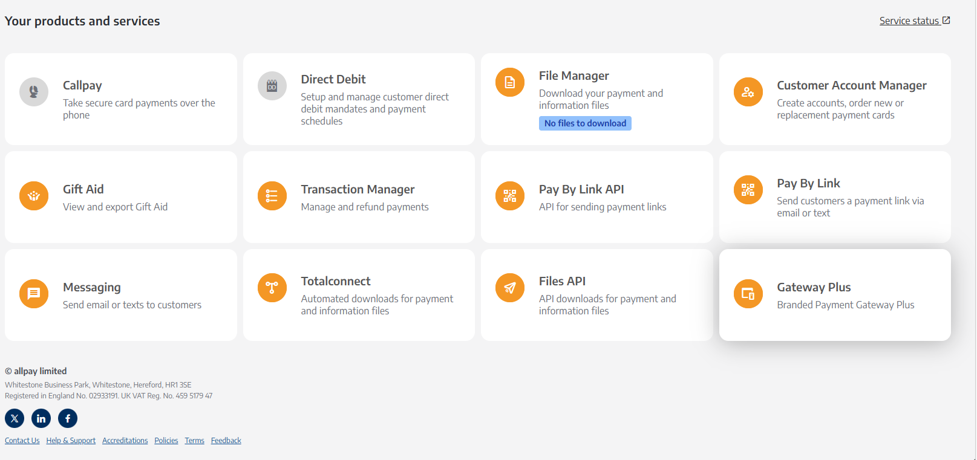
If the Gateway Plus tile is greyed out you do not have the required permissions. Contact your organisation’s Payments Hub administrator(s) for access.
For guidance on signing into the Payments Hub, please visit The Payments Hub User Guide
User Permissions
Your organisation's Gateway Plus tier determines which features are available. Your Payments Hub user permissions determine which of those available features you can access.
It is important to note that assigning a user permission does not add a feature that is not included in your organisation’s Gateway Plus tier.
You must be a Payments Hub administrator to assign or update user permissions.
- Go to Manage User in the Payments Hub.
- Select Invite Users to create a new user, or View User to update an existing user.
- Select the relevant Gateway Plus permissions for the user’s role.
- Save the changes.
Available permissions may include:
- Gateway Plus: Access and configure Gateway Plus.
- iFrame Builder: Configure the Gateway Plus iFrame.
- Branding: Customise the branding of the payment page.
- Gift Aid: Access Gift Aid donation data (where this functionality is included in your organisation’s service).
If you cannot access a feature required for your role, contact your organisation’s Payments Hub administrator(s).
Gateway Plus Tiers
There are three Gateway Plus tiers; 1:Essential, 2:Professional and 3:Enterprise (coming soon).
Your organisation's Gateway Plus tier determines which functionality is available. Your access to that functionality is also controlled by the Payments Hub permissions assigned to you.
Functionality available across all Gateway Plus tiers
- A hosted payment page.
- Card Payments.
- Apple Pay and Google Pay (where supported).
- Gateway language selection: English, Welsh, Romanian, Polish, Ukrainian.
- A unique hosted gateway URL.
Tier 1 : Essential
Tier 1 : Essential provides an allpay branded hosted payment page that customers can use to make secure online payments using the payment methods enabled for your organisation.
The Hosted Gateway URL on your Gateway Plus dashboard is the web address for your live payment page. Copy and paste the URL into a browser to view the live payment page. You can then share the URL with customers or embed it as part of your existing payment journey.
In addition, for charities, Gift Aid functionality may be included as part of onboarding.
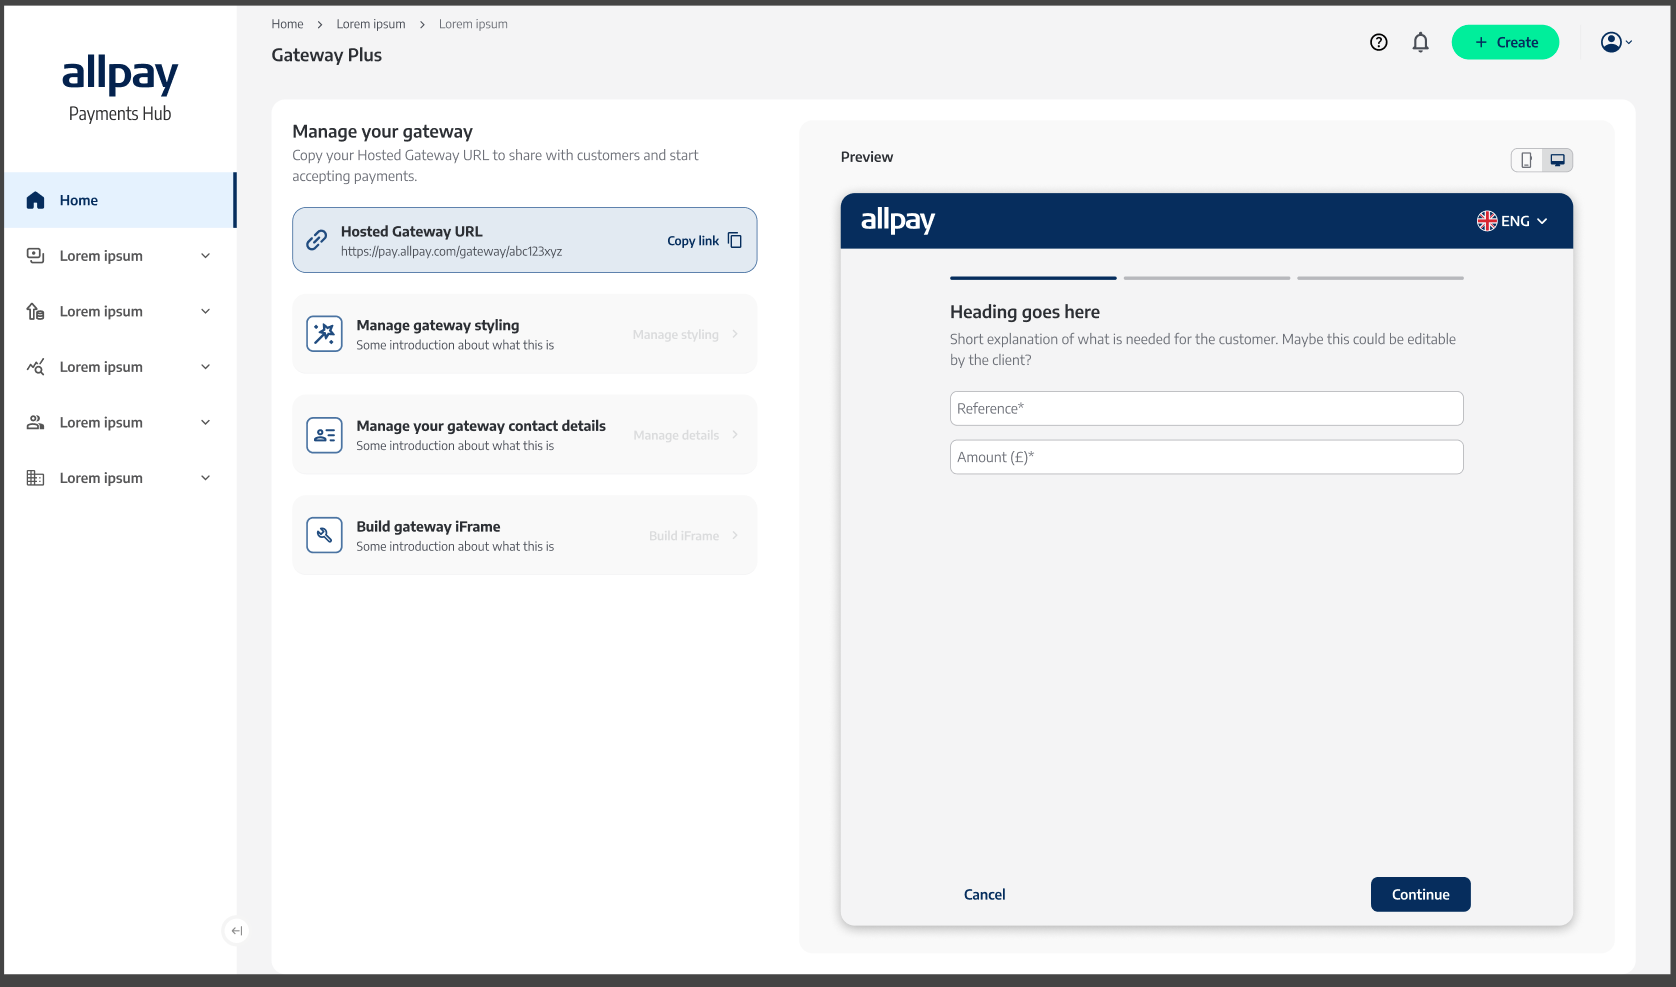
For Tier 1 : Essential, Manage Gateway Styling and Build Gateway iFrame are not available and will appear greyed out on the Gateway Plus dashboard. If you would like greater control over the design and configuration of your gateway page, please speak to your Client Development Manager.
Tier 2 : Professional
Tier 2 : Professional includes all Essential functionality, together with the tools to customise and configure your payment page and embed within your website or application.
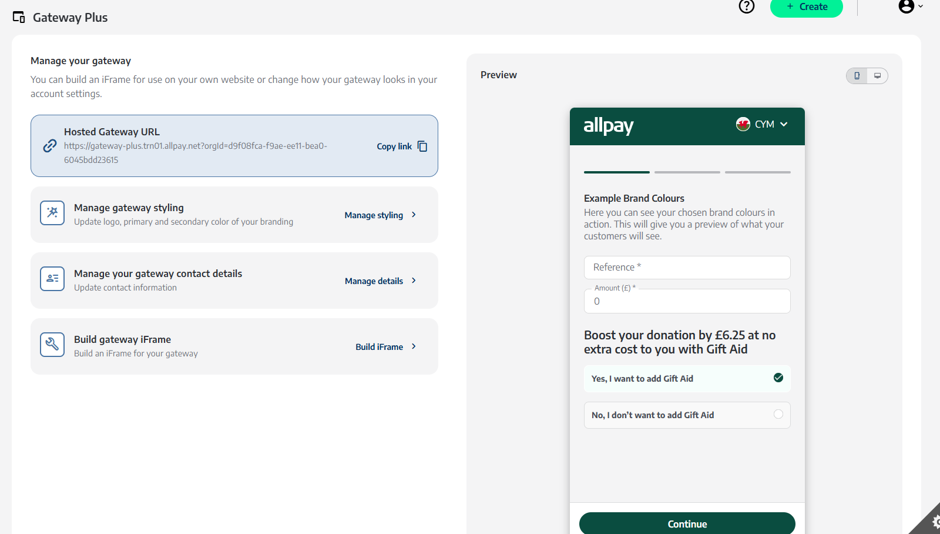
Manage gateway styling
Use Manage Gateway styling to customise and configure the appearance of your payment page. The preview frame on the right-hand side of the screen updates as you make changes, allowing you to review the page before publishing.
You can customise the following settings:
-
Logo
Add your organisation’s logo to display at the top of the payment page. For best results, we recommend:
- File type: PNG with transparent background
- Size: 400x100 pixels
- Quality: Clear, high-resolution image
Images are resized to fit the available space. For the clearest result, use the recommended dimensions and avoid uploading a small or low-quality image.
-
Brand colour
Select your organisation’s primary colour to apply it to key elements of the payment page, including buttons, headings and other highlighted elements. You can select your colour in either of the following ways:
- Use the colour picker.
- Enter HEX or RGB colour value.
Gateway Plus checks the contrast of your selected colour. See Accessibility Check below for more information.
-
Fixed buttons
Use Fixed Buttons to control how the primary action buttons appear on mobile devices.
- On: The buttons remain fixed at the bottom of the screen while the customer scrolls
- Off: The buttons move with the page content and appear at the end of the form.
-
Support Page Link
Add a link to your organisation’s support or contact page. The link is displayed when an error message is shown, allowing customers to access further help.
Use the most relevant support or contact page for your customers. Alternatively, you can link to allpay’ s support page .
-
Accessibility check
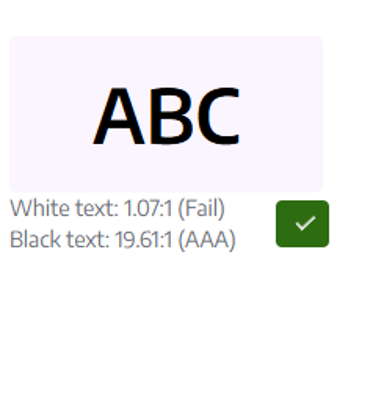
Gateway Plus automatically checks the contrast between your text and brand colour.
- Green tick: The colour combination meets the required contrast accessibility level.
- Red cross: The colour combination does not meet the required contrast level. Please select a different colour.
This check helps ensure your payment page can be used by as many customers as possible.
-
Publishing your changes
Review your selections in the preview window before publishing.
- Check that the logo, colours, buttons and support link appear as expected.
- Select Publish Branding to apply the changes to the live payment page.
Remember changes made in Manage gateway styling are not visible on your live payment page until you publish them.
Build Gateway iFrame
Use Build gateway iFrame to configure how your payment page appears when it is embedded within your website or application.
Depending on your configuration, you can:
- Show or hide page elements
- Configure fields that can be pre-populated
- Set available default values
- Select the default payment page language
As you customise the iFrame, the embed code updates automatically. Copy the latest code (Copy code) and add it to your website or application when your configuration is complete.
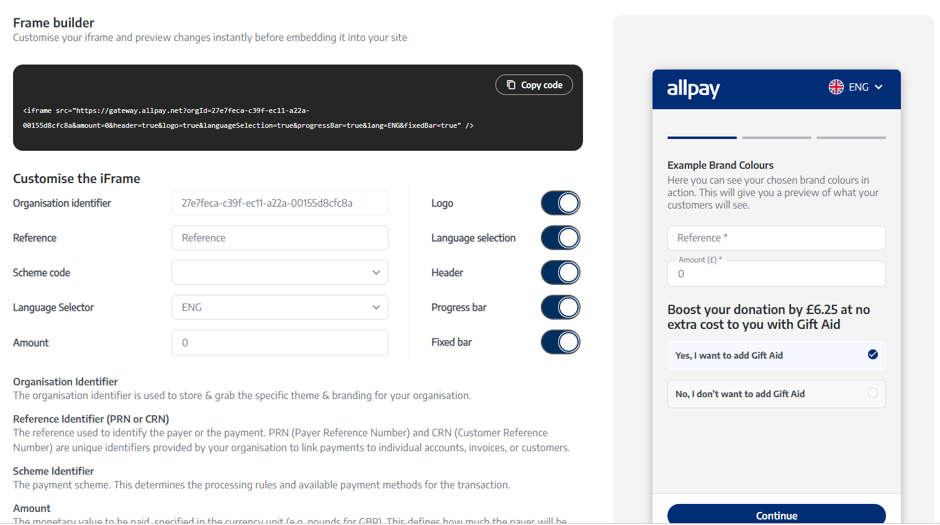
For security, the iFrame can only be embedded on website domains provided by your organisation and allowed for use with Gateway Plus.
Make sure the relevant web domain has been allowed before adding the iFrame to your website or application.
HMAC signature
Build Gateway iFrame also provides access to HMAC (Hash-based Message Authentication Code) functionality.
HMAC is a security mechanism that uses a shared secret key to generate a unique digital signature that can be used to verify information has not been altered and can be trusted. For Gateway Plus, this is used for real-time transaction monitoring.
Security, keep the associated HMAC secret key secure and do not include it in publicly accessible content. Confirm the required HMAC setup with your technical contact before implementation.
Making your Gateway Live
When your configuration is complete, review the full payment journey to make sure it looks and works as expected. You can then make the payment page available to customers by:
- Sharing the Hosted Gateway URL.
- Embedding the Gateway Plus iFrame within your website or application.
Complete a final check using the same journey your customers will follow before sharing or embedding the payment page.
Contact Information
We offer a wide range of support services for all aspects of our business and products.
For all contact details, please refer to our contact page on our website: